-
Github Action을 사용한 CI/CDCS 공부/AI 2023. 7. 4. 19:08
Git Flow

- Continuous Integration (지속적 통합)
- 새롭게 작성한 코드 변경 사항이 build, test 진행 후 test case에 통과됐는지 확인
- 지속적인 코드 품질 관리
- 개발자 모두가 CI 프로세스 진행
- Continuous Deploy (지속적 배포)
- 작성한 코드가 신뢰 가능한 상태가 되면 자동으로 배포될 수 있도록 하는 과정
- CI 이후 CD 진행
- dev/staging/main 브랜치에서 Merge가 될 경우 코드가 자동으로 서버에 배포
- CI / CD
- Voila, Streamlit에 적용
- local에서 개발하고 main으로 merge시 production 서버에 포드 배포
- Jenkins, circleci, travis CI, github action 등이 있음
Github Action
소프트웨어 Workflow 자동화를 도와주는 도구
Workflow 예시
- Test Code: 특정 함수의 return 값이 어떻게 나오는지 확인
- 배포: Prod, Staging, Dev 서버에 코드 배포
- 파이썬, 쉘 스크립트 실행: github repo에 저장된 스크립트를 일정 주기를 가지고 실행 (crontab 대용)
- Github Tag, Release 자동 생성: 새로운 브랜치 생성시 특정 작업 실행
제약조건
- Workflow 최대 20개까지 가능
- Job은 최대 6시간 실행 가능, 동시에 실행할 수 있는 Job 제한 존재
Github Action Core
- Workflow (최상위 개념): 여러 job으로 구성되고 event로 trigger되는 자동화된 process
- YAML파일로 작성됨, .github/workflows 폴더에 저장
- Event: Workflow를 trigger하는 특정 활동, 규칙 (특정 branch로 push, 특정 시간에 반복)
- Jobs: Runner에서 실행되는 Steps의 조합
- Steps: Job에서 실행되는 개별 작업, Action을 실행하거나 shell 커맨드 실행
- Actions: Workflow의 제일 작은 단위, Job을 생성하기 위해 여러 step을 묶은 개념
- Runner: Workflow가 실행될 서버
YAML 파일 분석
# This workflow will install Python dependencies, run tests and lint with a single version of Python
# For more information see: https://docs.github.com/en/actions/automating-builds-and-tests/building-and-testing-python

name: Python application

on: # Workflow를 언제 실행할 것인지
  push:
    branches: [ "master" ]
  pull_request:
    branches: [ "master" ]

permissions:
  contents: read

jobs:
  build: #job의 이름

    runs-on: ubuntu-latest #ubuntu 환경에서 실행

    steps:
    - uses: actions/checkout@v3 #사용할 github action
    - name: Set up Python 3.10 #step 이름
      uses: actions/setup-python@v3
      with:
        python-version: "3.10"
    - name: Install dependencies
      run: |
        python -m pip install --upgrade pip
        pip install flake8 pytest
        if [ -f requirements.txt ]; then pip install -r requirements.txt; fi
    - name: Lint with flake8 # uses가 없는 경우 run에서 작성된 shell 커맨드 실행
      run: |
        # stop the build if there are Python syntax errors or undefined names
        flake8 . --count --select=E9,F63,F7,F82 --show-source --statistics
        # exit-zero treats all errors as warnings. The GitHub editor is 127 chars wide
        flake8 . --count --exit-zero --max-complexity=10 --max-line-length=127 --statistics
    - name: Run hello world
      run: |
        python hello-world.py
Google Cloud compute engie에서 streamlit 실행하기
- VM 인스턴스 생성
- 터미널 진입 후 SSH key 생성 (cd ~/.ssh/ , ssh-keygen -t rsa -b 4096 -C "이메일")
- cat id_rsa.pub >> authorized_keys (cat id_rsa.pub을 실행한 후, 복사)
- GCP Console 메타데이터-SSH 키로 이동한 후 수정, 복사한 키 추가한 후 저장
- Githhub secret에서 외부IP, Username, Private Key 저장
- 터미널에서 github clone한 이후 streamlit 실행
- GCP Console에서 VM 인스턴스-방화벽 규칙 설정에서 방화벽 규칙 만들기
- VM 인스턴스의 인스턴스에서 네트워크 태그에 7번에서 생성한 방화벽 이름 추가
- 끝!
Github Action을 사용한 배포 자동화
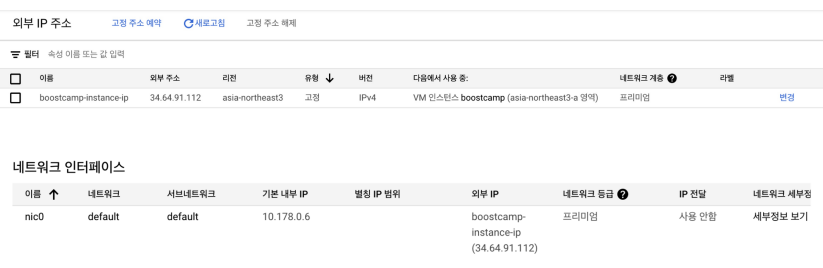
name: CICD-SSH
on:
  push:
      branches: [ main ]
      paths: # 이 경로에 있는 파일이 변경된 경우에 실행
        - 'part2/04-cicd/**'

jobs:
  build:
    runs-on: ubuntu-latest
    steps:
    - name: executing remote ssh commands using ssh key
      uses: appleboy/ssh-action@master
      with:
        host: ${{ secrets.HOST }}
        username: ${{ secrets.USERNAME }}
        key: ${{ secrets.SSH_KEY }}
        port: 22
        script: | #쉘 스크립트 실행
            cd ${{ github.event.repository.name }}/part2/04-cicd
            sh deploy_ssh.sh
VPC 네트워크 - 외부 IP 주소로 이동해서 사용하고 있는 IP의 '예약' 클릭하면 고정된 외부 IP를 사용할 수 있음
'CS 공부 > AI' 카테고리의 다른 글
[Serving] Cloud (0) 2023.07.02 [Segmenation] Semantic Segmentation의 다양한 기법들 (0) 2023.07.02 [Segmentation] DeepLab v2~v3+, PSPNet (4) 2023.06.08 [Segmentation] DeconvNet, SegNet, FC DenseNet, Unet, DeepLab, DilatedNet (0) 2023.06.06 [Segmentation] 딥러닝을 이용한 Segmentation FCN (0) 2023.06.06 - Continuous Integration (지속적 통합)